It started simple and it worked so easily that I thought it was simple. But there is a lot going on and I got lucky more times than I deserved. Here are some things I picked up along the way.
As simple as bread is, being just a combination of wheat and water, yeast and salt, it is full of variables that include those 4 items, as well as dozens of others.
A primary factor is the hydration. I use a 70% hydration, and for my simple mind; 500 grams of flour and 350 grams of water (by definition, that is also 350 ml of water.) The 500 grams of flour can be nearly anything – as long as it is substantially a wheat flour that builds gluten. Some don’t. Most that are sold are using wheat’s ability to build gluten …and that is what is described in the table below. Obviously, they don’t make a gluten free loaf…
Also down below is the flour that I combine to make my typical loaf.
Tools first, advice second
It is important to have a scale that will measure in grams. Sometimes I wish the one that I have would do tenths of a gram, but 99.9% of what I have done is met by the 15 euro scale that I have.
If you are tempted to use a measuring cup, know that depending on compaction and humidity, the amount of flour in the mix will be different – sifting helps this a bit. But you might not get the germ through the sifter…it is just easier to get a scale.
There is a thing about flour that it will soak up whatever amount of water you give it. You might find yourself doing the initial blending of the flour and water and find it is lumpy and dry and isn’t taking the last bits of flour and think, “Hey, a little more water will do the trick.” And you are right, but then you put in another splosh, and another…later on it will be very moist and unable to be touched without making a mess. It might be best to let it rest for 10 minutes and see if it is loose enough again to capture that remaining flour.
The way that flour is qualified in France is different than in Italy, and both are different than in the United States. From DeepSeek:
Italy, France, and the US each classify flour differently: Italy by “tipo” (00 to whole wheat), France by “type” (T45 to T150 based on ash content), and the US by protein content and intended use. Protein content is important, and always listed on the side of the bag in France and Italy as well.
Flour by Country
Scan across a row to find the closest equivalent when a recipe calls for a flour you don’t have.
| Flour type | Italy | France | US | Notes |
|---|---|---|---|---|
| Finest / lowest ash | Type 00 | T45 | Cake or pastry flour | Cakes, pastries, viennoiserie |
| All-purpose equivalent | Type 0 | T55 | All-purpose flour | General baking, biscuits, some bread |
| Slightly stronger AP | Type 0 | T65 | All-purpose or bread flour | T65 sits between US AP and bread flour |
| Bread / strong | Type 1 or Manitoba | T65 | Bread flour | Yeast breads, pizza |
| High-extraction / semi-whole | Type 1 or Type 2 | T80 | White whole wheat | Country breads, rustic loaves |
| Whole wheat | Type 2 or Integrale | T110 | Whole wheat flour | Denser, more nutritious breads |
| Whole grain / bran | Integrale | T150 | Whole wheat or graham | Heaviest, bran-forward breads |
| Durum / semolina | Semola | Semoule de blé dur | Semolina flour | Dried pasta, some breads |
| Self-rising (leavened) | (not standard) | (not standard) | Self-rising flour | US-only; contains baking powder + salt |
- Manitoba is a strong Italian flour for long-fermented breads and panettone; it doesn’t map cleanly onto the French or US scales.
- US cake flour is chlorinated and lower-protein than French T45 — a near match, not a perfect one.
- Italian tipo and French T numbers both track ash (mineral residue), but on different scales and against different wheat.
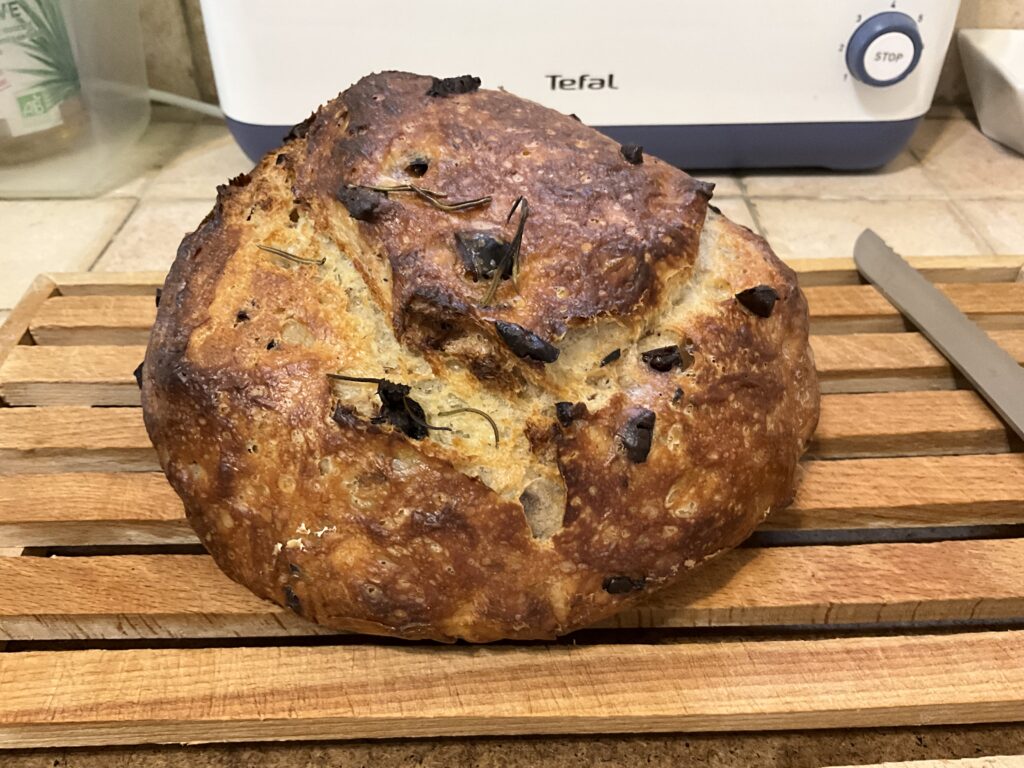
I am constantly experimenting. One time the loaf might be made with a white flour and one time a heavier whole wheat. Most of the time, I use 250 grams of the following blend that the supermarket calls Multi-céréales, which mixes some rye into the flour and has a bunch of sunflower and flax seeds. …then I add another 250 of something else. If I toss some not-too-finely cut up olives and/or sun-dried tomatoes, I will go for the lighter T-55 flour (make sure to cut in some rosemary and lay some bits of rosemary on top of the loaf while cooking.) I’ll choose T-65 if I have been eating a lot of whole grain for a while.
Here’s a bit of the deails about the Mylti-céreales blend so you can buy the same or similar locally:
The base flour: Carrefour Multi-céréales
A wheat-dominant blend — 67.4% wheat, 14% rye, 10% sunflower, 5% flax — not a whole-grain flour. It’s the backbone, with the rye and seeds along for flavor and texture.
| Option | What it is | Where to find it |
|---|---|---|
| King Arthur Harvest Grains Blend + bread flour | Mix ~70% bread flour with 30% Harvest Grains | King Arthur online, some Whole Foods |
| Bob’s Red Mill 10 Grain Bread Flour | Single bag, already blended | Amazon, Whole Foods |
| DIY | Bread flour + rye flour + sunflower seeds + flax seed | Bulk bins at Whole Foods |
- Don’t reach for a US bag labelled just “multigrain flour” — it’s usually white flour with a token amount of grains, not the 67/14 wheat-rye base you want.
- The key number is the 67% wheat: that’s what makes it a bread flour with character, not a whole-grain flour.
Building the 500 g
50% multigrain, 50% something else — and the “something else” rotates depending on the loaf.
| Blend | Multigrain | Other 50% | Effect |
|---|---|---|---|
| Everyday | 250 g | 250 g Complet or semi-complet | Darker, more rustic, fuller flavour |
| Lighter | 250 g | 250 g T55 | Softer crumb, less dense, more everyday-bread |
| With semolina | 250 g | 200 g Complet/T55 + 50 g semolina (~10%) | Semolina opens the crumb and adds a faint golden tint and gentle chew |
- Semolina at ~10% is the sweet spot for crumb — much more and it starts to dominate the flavour and tighten the texture.
- Because the multigrain carries rye and seeds, expect a slightly wetter, stickier dough than a pure white-flour recipe. A touch more water and a gentler shaping usually sorts it out.
Oy…suddenly this bread thing has gone from the simple…and I promised, simple. But at least you know what to look for at the Amazon/Whole Food aisle.
Yeast is a little more simple. The reason a scale that does tenths is important is that sometimes you only need 1 or 2 grams of yeast, dried or fresh. And even if the recipe says 2 gm, you don’t know if you really have 2.9 or 2.0.
But usually a packet of 5 or 6 grams will do the trick…or 2 bags. The difference will not only be a quicker rise, but with too much the bread will likely smell a touch more like yeast. But that depends on a lot of conditions.
The bags of wheat that I buy usually say that 1 x 5 gm packet of yeast will be fine if you are mixing by machine, but if by hand you need two. Whaaa?
The rest of this is a summary of what I told DeepSeek put into its own logic flow. …as I have to go now…I’ll add more of my jibber jabber in a bit.
- Don’t reach for a US bag labelled just “multigrain flour” — it’s usually white flour with a token amount of grains, not the 67/14 wheat-rye base you want.
- The key number is the 67% wheat: that’s what makes it a bread flour with character, not a whole-grain flour.
How I actually bake it
No kneading, no counter, no flour storm. Just a bowl, a spatula, a warm spot, and time. This is a low-knead method built on stretch-and-fold — the folds do the work that kneading would.
- Mix. If you don’t have a thermometer, get the water to the point that it just starts to bite…the yeast likes 100±5°. The bite point is about 100° F (38° C). Using a spatula in a large salad bowl, combine the flour, 1 packet of 5 or 6 grams of dry instant yeast, and 10 grams of salt and with 350 grams of water until everything is incorporated. No kneading. The dough will look shaggy and wet — that’s correct for this method. Cover with a wet towel.
- Warm proof. Put the bowl in a light-bulb-warmed oven at 25–26 °C for 45–60 minutes.
- First fold. With a spatula, pull the dough from the bottom of the bowl up and over the top, 4–6 times, turning the bowl 90° between pulls. This builds gluten and traps gas. Return to the warm oven.
- Second fold (optional). Same idea, but finer: work around the bowl in roughly 10° increments, pulling straight up each time. This mimics the tightening you’d get from shaping a ball on a counter — without the counter.
- Cold retard (optional). If you don’t have time to bake after the first or second fold, put the bowl in the fridge. This slows fermentation, deepens flavour, and makes the dough easier to handle. Overnight is fine. If you’re leaving it more than a few hours, use slightly less yeast — a full packet plus a long cold rest can over-proof by morning.
- Wet-spatula release. Wet the spatula and run it around the inside of the bowl in 10° increments. The water loosens the dough from the sides so it releases cleanly — no sticking, no torn edges, no fighting it into the Dutch oven.
- Into the Dutch oven. Tip the bowl upside down over the Dutch oven so the dough drops in. The wet-spatula step is what makes this clean.
- Bake. Lid on for the first stretch, lid off to colour and crisp the crust. (Your usual times and temperatures.)
| What you do | Why it works |
|---|---|
| 1 packet of yeast | Long ferment (warm proof + folds + optional fridge) does the work extra yeast would do |
| No kneading | Folds over time build the gluten instead |
| Warm proof at 25–26 °C | The yeast’s happy zone — no need to over-pitch |
| Cold retard | Slows everything, deepens flavour, means less yeast is fine |
| Wet-spatula release | Gets the dough out cleanly without deflating it |
- On the packet’s “2 for hand”: that’s aimed at someone kneading on a counter and proofing at room temperature with no fridge step. Your method replaces the kneading with folds and the room-temp proof with a controlled warm-then-cold schedule — so 1 is the correct amount for this process, not a shortcut.
- Semolina bonus: in your blend, the ~10% semolina makes the dough slightly less sticky, which helps the wet-spatula release. Probably not a coincidence.
- Want more release? A light oiling of the bowl before the last fold works alongside the water. Water releases from a wet bowl; oil releases from a dry one.
Then what? More detail to follow
Must add the point in time to pre-heat the oven to 240° C with the lid separated from the dutch oven for 30 minutes. Then turn that down to 230° C. And after 25 minutes take the lid off. Then curse yourself for trying to move the lid with out the oven mitt. Turn down the oven to 220° C and check the bread 7 minutes later…it should sound like a drum when turn over and tapped. It should be 95° C at the center of the loaf…90? Put it back in for 2 minutes or so.